Thursday 29 May 2014

Pathways Project - Journey 4

The Finshed Pages
 
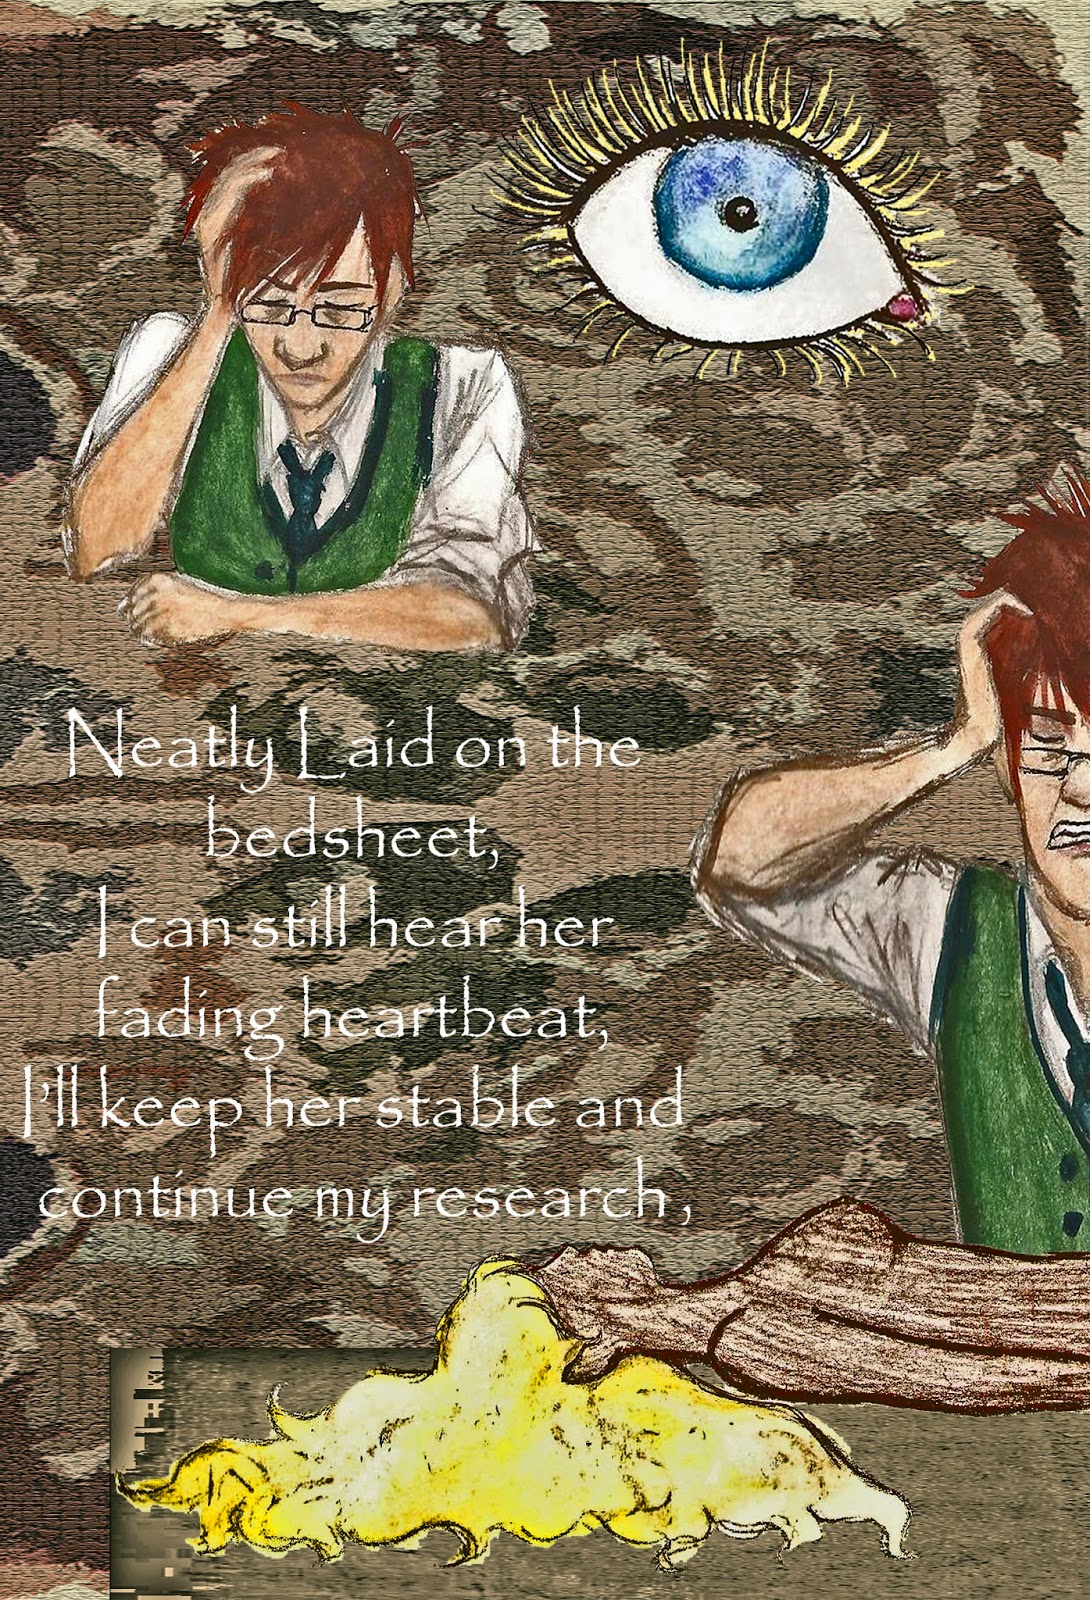
These are the official pages which I sewed into my journal for my final piece; I'm very happy with how they turned out. So happy that I was a bit disappointed with how they turned out after I printed them; slightly darker than supposed to be and all featuring a white border which I couldn't remove because I printed them on word. There was no major damage otherwise; some of the pages were missing their original edges because of the borders (which overlapped them), but thankfully none of the words of pivotal images were cut out.
 
However this is why I'm happy I have this blog, so I can show people how the pages are really meant to look in all their glory.
 
One little note I forgot to add into my sketchbook:
"Please Listen to song while reading the book, to help fully appreciated the emotions/story/themes I am trying to convey with my work, thank you."
 
And I recommend the same to whoever is reading this blog.


Unfortunately I am Aware That I have missed out a line between these pages, I myself am very unhappy about this; but I did not discover this until after I had printed everything and was sewing together the final piece the night before the hand in. Hence I had no time to fix this.


Another wee mistake: "Say" should be "Pleading"


I hope you all enjoy reading this (and are not too disturbed), I am very proud of my work and hope to use illustration more for my future projects.

Pathways Project - Journey 3

The Book!
Final Piece For: 27/05/2014
For the book itself, I decided to style it after a journal; going with the idea of it being a "Doctor's" work journal. Throughout the song The Doctor's typing up his findings/research/experiments on how he goes about trying to save his wife, which is why I felt that this type of book would fit the theme; He telling the story and its his journal.
 
Its quite simple and only size A5,which I chose because I felt that it was a realistic size for an old doctor's journal and also because I thought it looked neat and gave the feel of a real published book to whoever's reading it.

 
I hand-sewed every part together myself:
 
  • I measured leather to be the same height as the page sizes, and to be wider than half the width of the pages on each side (see below)
  • I sewed the pages together and then sewed them onto the leather (around the middle)
  • When I printed to pages, rather than printing them back to back, I printed them all one sided and stuck them together back to back instead; because I felt that the book could do with a bit of extra bulk and this would help.
  • I sewed straps onto the right hand side of the leather and sewed buttons onto the other side.
  • For the buttons I decided to go with a pair of old fashioned, gold (looking), patterned ones; because I felt that they would continue to convey the Victorian theme but also I thought it would help to make the book a bit more eye-catching/fancy.


Pathways Project - Journey 2

I stupidly Handed In My Sketchbook Before I took Photo's Of The Pages Themselves
 
Sorry.
 
However I will add onto this post, a few examples of my drawings scanned onto my computer; some edited, some normal; to show examples on how I went about making some of my illustrations.

First Sight

I decided to try colouring a couple of my drawings on Photoshop, partly because I wanted to duplicate the same figures three times, just to change the expressions on their faces (Saved me re-drawing the figures three times).


 I like the results, however I decided that colouring the drawings on Photoshop took too long and decided to continue colouring my drawings with water colours (with the exception of Photo-shopping patterns into certain pieces of clothing: Pink dress above).


"And I'll never forget, when we first were courting,
And she faced me, and her eyes were gleaming..."

 
 For Both Man and Woman:
 
Expressions: 1. Notice each other
2. embarrassed to be caught
3. but happy it finally happened anyway.
 
Collage
 
Combining real photographs to my drawings on Photoshop; I wanted certain objects (e.g. Typewriters, mechanical objects) to look realistic to help convey the "Victorian steampunk" theme that comes with the song. However I felt that if I wanted to make realistic drawings/paintings of mechanical objects, just the process of painting them perfectly would take up too much of my time and I wanted to make every page as good as I can (and of course I still had to make the book itself). So I decided to instead just Photoshop the real photos into the pages instead.
 
I found all the photos I used throughout this project on Google Images.


I actually Like the result much more than I thought I would; I was afraid that the photos would look out of place in my paintings, but I think it actually does help to convey a realistic Victorian (near steampunk) theme.
 
Below: More examples on using Collage.


Patterned Cut-Outs
 
Before I began make my Official illustrations, I decided to do a little experiment on making images out of cut out bits of paper (In this case, patterned paper I bought from "The Works"). I loved the results; I felt as though I was making/designing real Victorian dresses thanks to the patterns. despite this, the process was too time consuming for the project; I planned on making  over 3 pages in my book and I had to make the characters in different costumes and in different positions: If I had more time on the project I would have definitely continued, but sadly I had to put aside the cut-out designs for this project.
 
 
But!
 
I loved the dresses I made and the patterns so much, I decided to adapted my cut-out idea; When it came to painting my figures I would leave parts of the clothes blank so I could Photoshop the patterns in their place; so in a way, I got to keep my original plan.


 These are some of my Favourite drawings out of the whole project.